Embroidered Brooches
Posted: Sat Sep 06, 2014 7:28 pm
Here is a rundown of my method for making brooches without using badge machine.
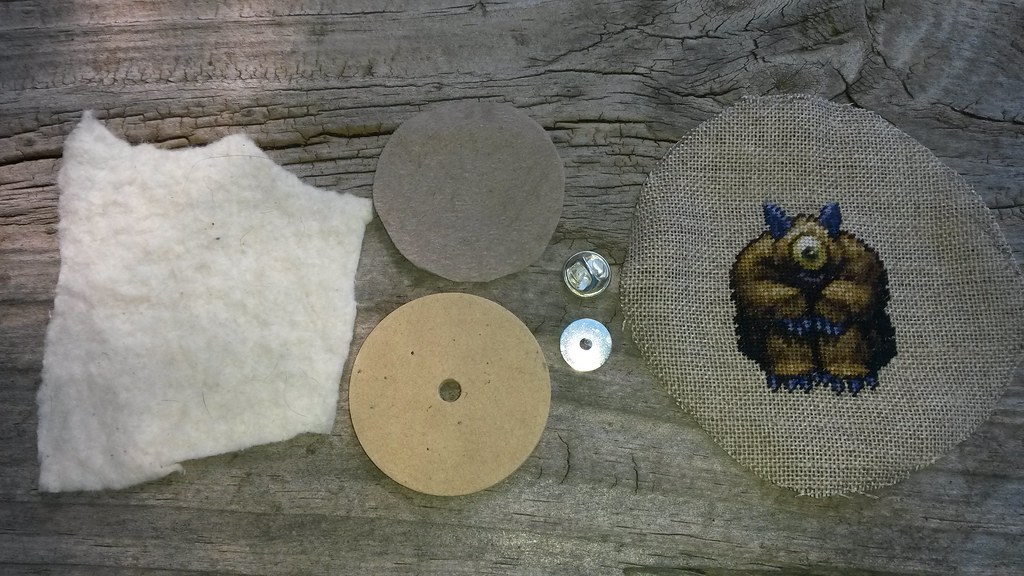
You will need the following:
 Brooch Tutorial 1 by Lucy Bad Dog, on Flickrlo
1. Some kind of padding, you will need a piece larger than your wooden disk - I am using leftover cotton quilt wadding but you could use felt or anything a bit squishy and not too thick.
2. A piece of felt cut to size of your wooden disk.
3. A wooden disk large enough to fit your finished design - I am using bear joint disks, they are easy to get from bear suppliers and you can buy bulk bags in a single diameter.
4. A brooch pin - this comes in two parts, the spike which looks a bot like a drawing pin and a locking back to keep the brooch on, I mail ordered mine from an online jewelry supplier.
5. Your finished embroidery cut with enough fabric left around it to wrap round to the back of the disk.
6. PVA glue and some kind of super strong multi-purpose glue (I use Tarzan Grip)
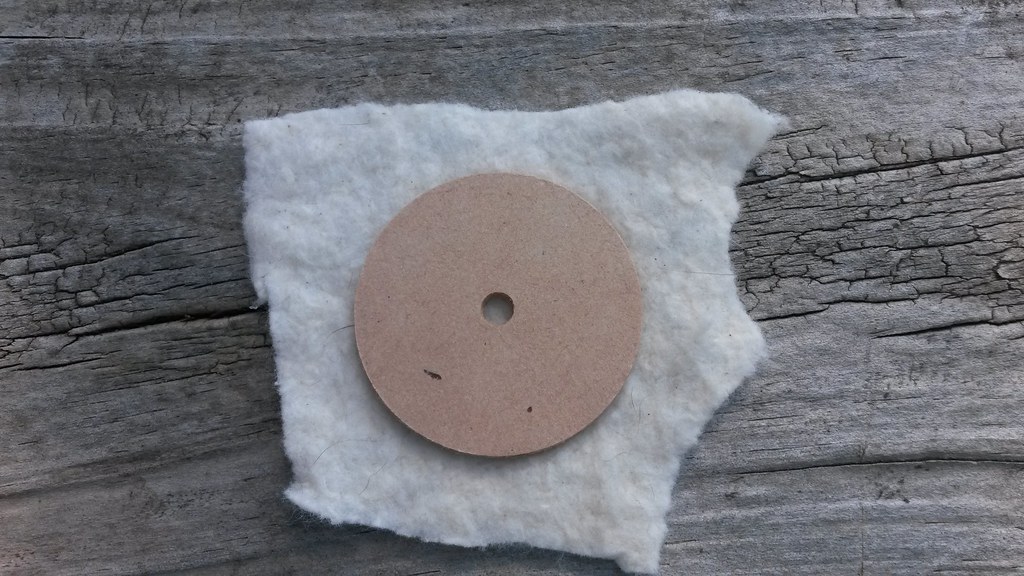
Firstly glue your wooden disk to the padding using PVA glue - leave plenty of padding round the edge.
 Brooch Tutorial 2 by Lucy Bad Dog, on Flickr
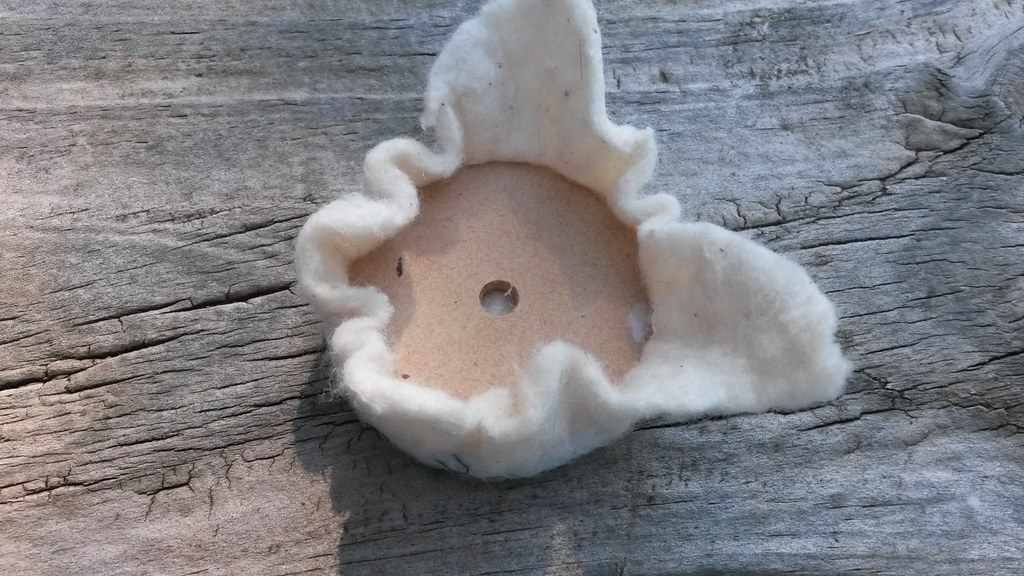
Run a line of glue around the edge of the disk.
 Brooch Tutorial 3 by Lucy Bad Dog, on Flickr
Press the padding round the sides of the disk and hold until the glue takes over.
 Brooch Tutorial 4 by Lucy Bad Dog, on Flickr
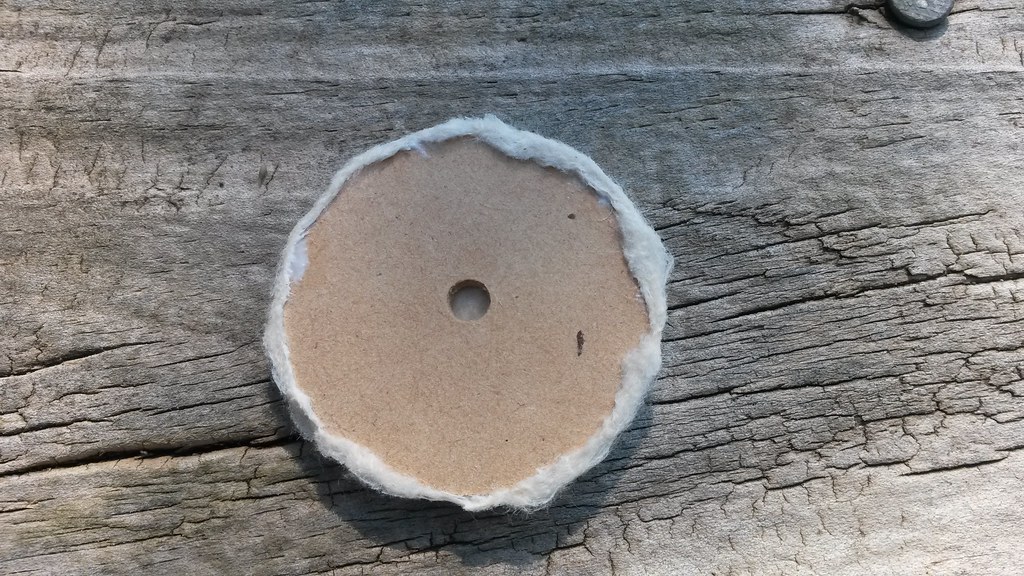
Once glue is dry, trim away the excess padding.
 Brooch Tutorial 5 by Lucy Bad Dog, on Flickr
Now glue the brooch pin to the center of the disk using strong glue and leave to fully dry.
 Brooch Tutorial 6 by Lucy Bad Dog, on Flickr
Now center your embroidery over the padded side of the disk - you will need to be careful not to shift it around too much during the following process or it will end up wonky.
Put two blobs of PVA glue on opposite sides of the disk.
 Brooch Tutorial 7 by Lucy Bad Dog, on Flickr
Wrap your embroidery around the disk and hold until the glue takes over.
 Brooch Tutorial 8 by Lucy Bad Dog, on Flickr
Now you will need to put cuts in the embroidery next to the two glued areas - be careful and stop the cuts before you get to the edge of the disk or else they will be visible when you are done.
 Brooch Tutorial 9 by Lucy Bad Dog, on Flickr
Put two more blobs of glue on the disk at ninety degrees to the last two and again wrap the embroidery around had hold till the glue sets.
 Brooch Tutorial 10 by Lucy Bad Dog, on Flickr
These flaps will also need to be cut like the last two.
 Brooch Tutorial 11 by Lucy Bad Dog, on Flickr
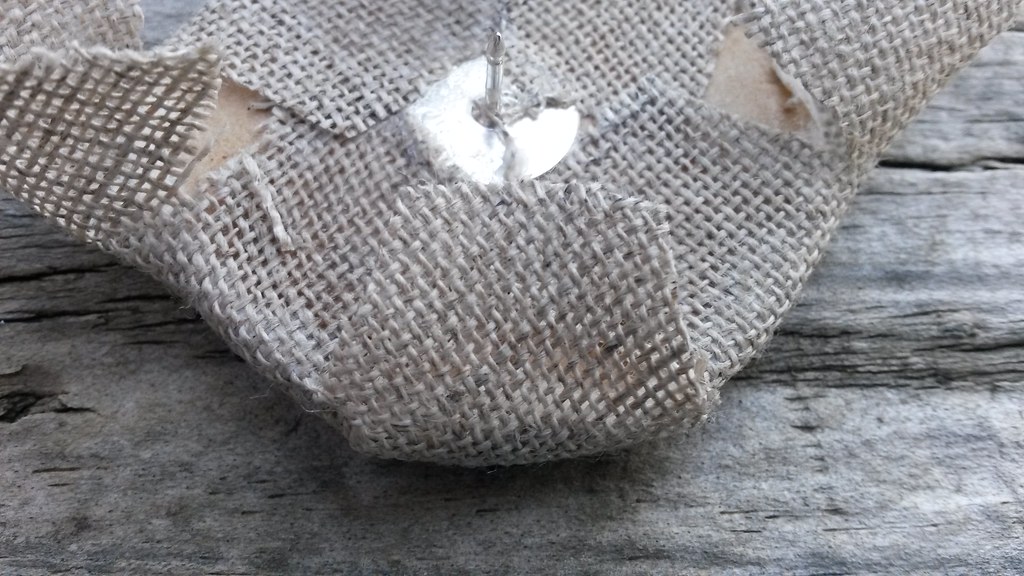
The last four flaps can then be glued down - you will need to trim them to reduce bulk and make sure they do not show.
 Brooch Tutorial 12 by Lucy Bad Dog, on Flickr
For those of you familiar with clipping curves when sewing, we are effectively taking triangular notches out of the edge of the circle of embroidery fabric. We don't do it first because it is too easy to mess up and end up with visible cuts and edges. The number of flaps you will need to glue down depends on the size of your disk, very small disks (i.e. 20mm) might only have four and larger discs could have more than eight (this tutorial used a 45mm disk).
If you end up with corners on the edges of the brooch you can ease them out using a bit of glue and then sort of squishing the fabric towards the back of the brooch.
 Brooch Tutorial 13 by Lucy Bad Dog, on Flickr
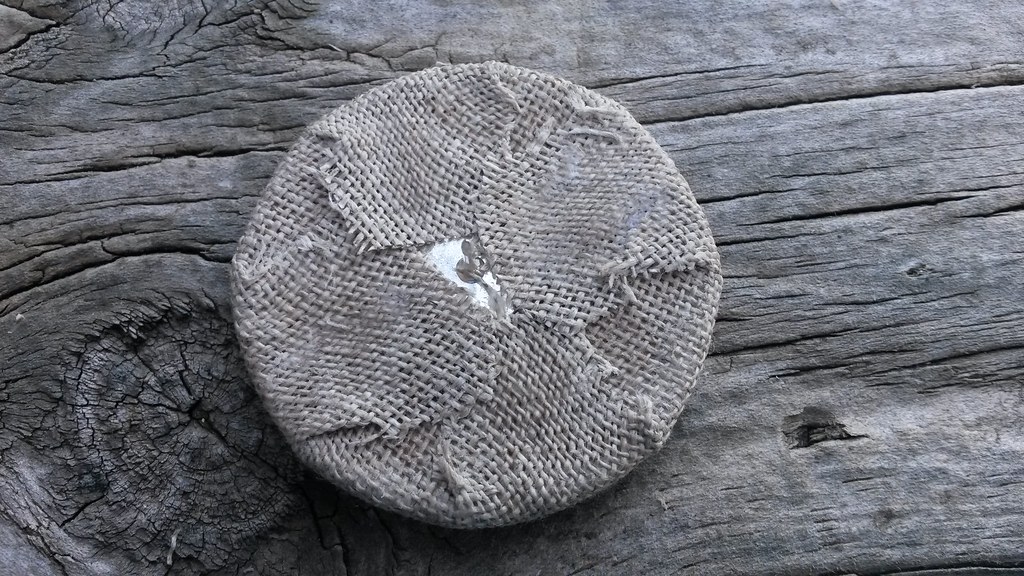
Make a hole in the center of the felt circle using the brooch pin - do it before you put the glue on it saves a lot of potential mess.
 Brooch Tutorial 15 by Lucy Bad Dog, on Flickr
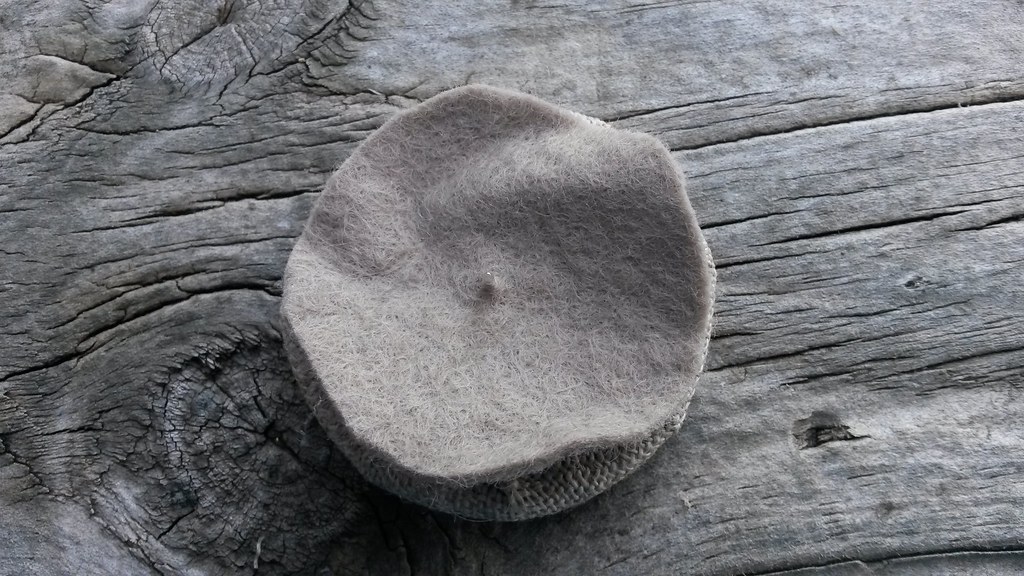
Put PVA glue all over the back of the brooch and apply the felt. Once dry attach the back.
 Brooch Tutorial 15 by Lucy Bad Dog, on Flickr
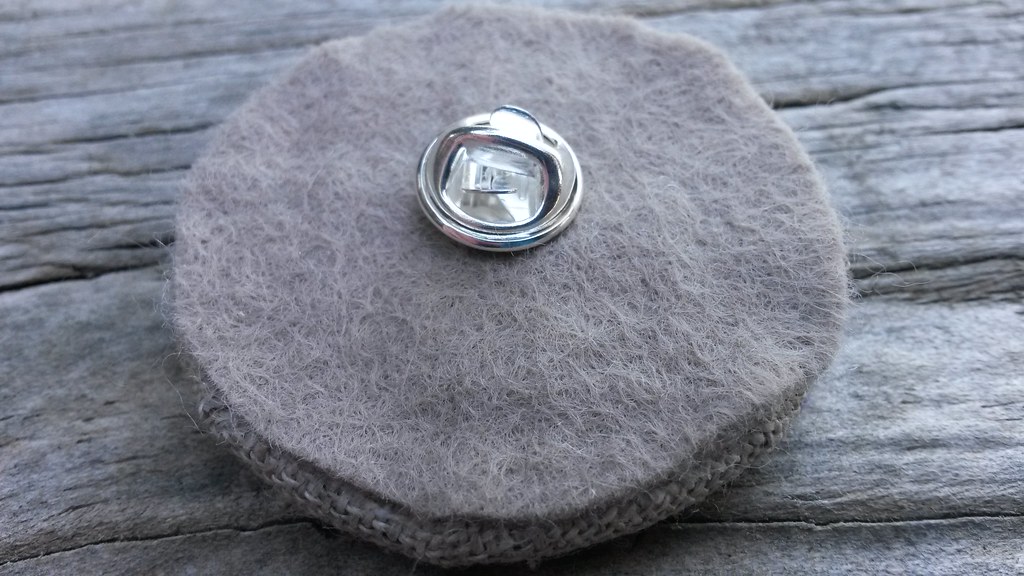
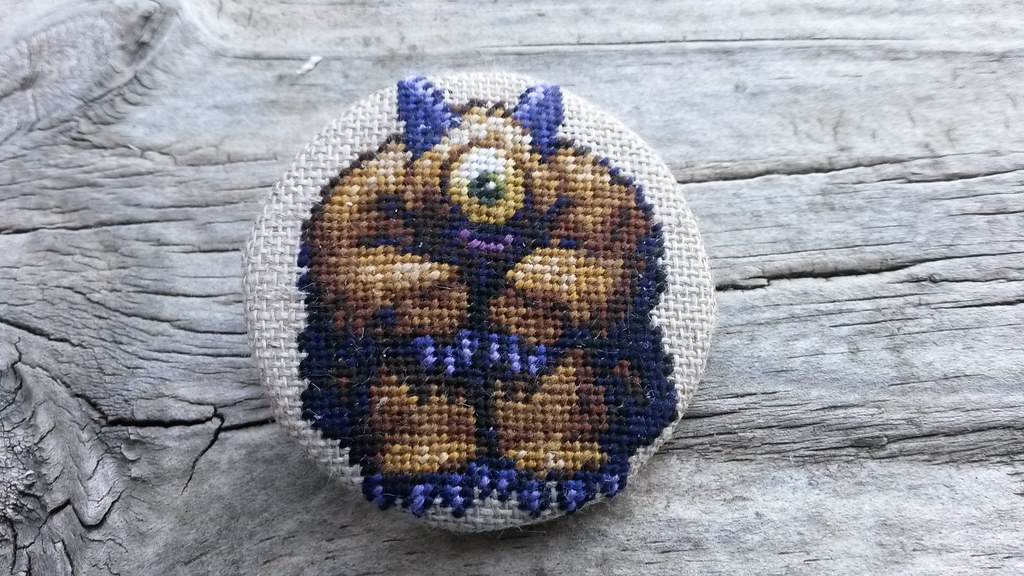
You should now have a lovely brooch - IMPORTANT NOTE do not let it go through the washing machine the disk will not survive.
 Brooch Tutorial ) 16 by Lucy Bad Dog, on Flickr
You will need the following:
Brooch Tutorial 1 by Lucy Bad Dog, on Flickrlo1. Some kind of padding, you will need a piece larger than your wooden disk - I am using leftover cotton quilt wadding but you could use felt or anything a bit squishy and not too thick.
2. A piece of felt cut to size of your wooden disk.
3. A wooden disk large enough to fit your finished design - I am using bear joint disks, they are easy to get from bear suppliers and you can buy bulk bags in a single diameter.
4. A brooch pin - this comes in two parts, the spike which looks a bot like a drawing pin and a locking back to keep the brooch on, I mail ordered mine from an online jewelry supplier.
5. Your finished embroidery cut with enough fabric left around it to wrap round to the back of the disk.
6. PVA glue and some kind of super strong multi-purpose glue (I use Tarzan Grip)
Firstly glue your wooden disk to the padding using PVA glue - leave plenty of padding round the edge.
Brooch Tutorial 2 by Lucy Bad Dog, on FlickrRun a line of glue around the edge of the disk.
Brooch Tutorial 3 by Lucy Bad Dog, on FlickrPress the padding round the sides of the disk and hold until the glue takes over.
Brooch Tutorial 4 by Lucy Bad Dog, on FlickrOnce glue is dry, trim away the excess padding.
Brooch Tutorial 5 by Lucy Bad Dog, on FlickrNow glue the brooch pin to the center of the disk using strong glue and leave to fully dry.
Brooch Tutorial 6 by Lucy Bad Dog, on FlickrNow center your embroidery over the padded side of the disk - you will need to be careful not to shift it around too much during the following process or it will end up wonky.
Put two blobs of PVA glue on opposite sides of the disk.
Brooch Tutorial 7 by Lucy Bad Dog, on FlickrWrap your embroidery around the disk and hold until the glue takes over.
Brooch Tutorial 8 by Lucy Bad Dog, on FlickrNow you will need to put cuts in the embroidery next to the two glued areas - be careful and stop the cuts before you get to the edge of the disk or else they will be visible when you are done.
Brooch Tutorial 9 by Lucy Bad Dog, on FlickrPut two more blobs of glue on the disk at ninety degrees to the last two and again wrap the embroidery around had hold till the glue sets.
Brooch Tutorial 10 by Lucy Bad Dog, on FlickrThese flaps will also need to be cut like the last two.
Brooch Tutorial 11 by Lucy Bad Dog, on FlickrThe last four flaps can then be glued down - you will need to trim them to reduce bulk and make sure they do not show.
Brooch Tutorial 12 by Lucy Bad Dog, on FlickrFor those of you familiar with clipping curves when sewing, we are effectively taking triangular notches out of the edge of the circle of embroidery fabric. We don't do it first because it is too easy to mess up and end up with visible cuts and edges. The number of flaps you will need to glue down depends on the size of your disk, very small disks (i.e. 20mm) might only have four and larger discs could have more than eight (this tutorial used a 45mm disk).
If you end up with corners on the edges of the brooch you can ease them out using a bit of glue and then sort of squishing the fabric towards the back of the brooch.
Brooch Tutorial 13 by Lucy Bad Dog, on FlickrMake a hole in the center of the felt circle using the brooch pin - do it before you put the glue on it saves a lot of potential mess.
Brooch Tutorial 15 by Lucy Bad Dog, on FlickrPut PVA glue all over the back of the brooch and apply the felt. Once dry attach the back.
Brooch Tutorial 15 by Lucy Bad Dog, on FlickrYou should now have a lovely brooch - IMPORTANT NOTE do not let it go through the washing machine the disk will not survive.
Brooch Tutorial ) 16 by Lucy Bad Dog, on Flickr