Since most of the people on this board are cross stitchers, or are wanting to cross stitch and have already read those guides, I can skip some of the “stitching basics” that would otherwise be necessary. Embroidery is a lot like cross stitch, but it's more free form than working from a chart or an organized grid. The materials are basically the same, except for the fabric used. Evenweave fabric is not necessary. Any cotton fabric will do, such as quilting fabric. You can use a solid color or a lightly patterned fabric.
Place your chosen fabric into a hoop.
A hoop really is helpful in embroidery, even more so than in cross stitch. (The fabric is generally a lighter weight and some stitches are long, so it's good to have your fabric taut.)
Next you want to figure out what your design will be.
You can stitch anything- line drawings, text, abstract designs, or embellish a printed picture or design.
Once you have your design picked out, there are different ways to transfer that design.
You can draw directly onto the fabric.
If you do this, it's best to use a vanishing ink pen. You can usually find these in the quilting section of a craft store. The ink washes off easily with water. If you use a regular pen or pencil, make sure to draw the design lightly so that you can cover it completely with your stitches. You can draw free hand, or trace a design by placing your fabric on top of the design and then setting these over a light box, a window, or something light or dark (depending on your fabric) and then tracing.
You can also use an iron-on transfer.
Some you can buy already made. To make your own, trace your design onto tracing paper. Turn the paper over and use an iron-on transfer pen or pencil. Put the transfer side of the paper onto the fabric and iron it, following the instructions that came with the transfer pen or pencil.
Now for the actual stitching.
There are many embroidery stitches, which can be covered in another guide. For now we'll stick to the basics, which will be all you need to get started. Use embroidery floss, just like you would for cross stitch. Use as many or as little strands and you want, depending on how thick you want your stitches to be. To do any line work, use a backstitch.
Backstitch: See the picture below.
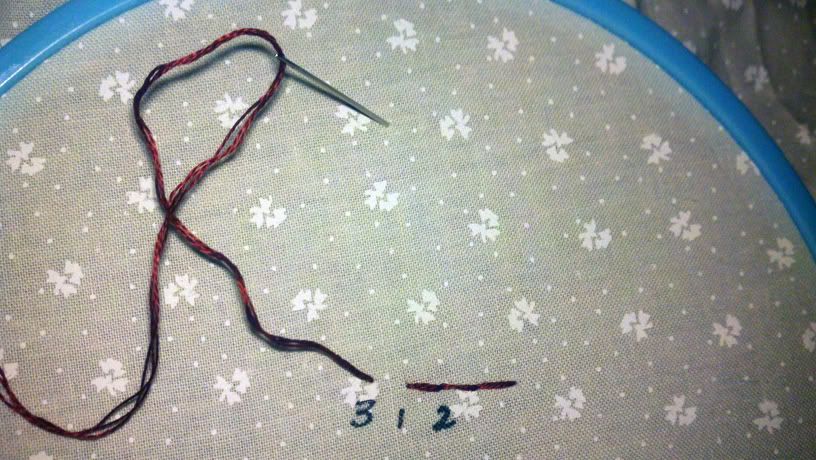
First, bring the needle up at 1, then down at 2 and up at 3.
To start the next stitch, insert the needle at 1 again.
Repeat along your line, keeping the stitches as even as possible. Basically, after you come up at 3, you reinsert the needle into the same hole as 1.
Some of you may have used backstitch in cross stitch before.
There isn't any grid or Aida holes, so it's up to you to keep your stitches even. Or not! It's up to you. That's one of the great thing about embroidery. You can do anything you want with it. Even supposed “mistakes” can make an embroidered piece more interesting and “artsy.”
So, now you can outline your design. But what if you want to “color it in,” so to speak? Two options are:
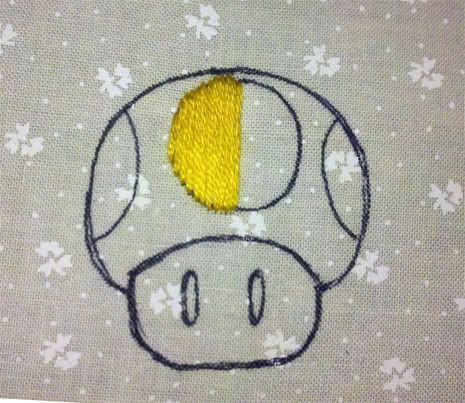
Satin Stitch: These are long, flat stitches laid next to each other to cover an area.
Bring your needle up along the outer edge of the shape and reinsert your needle across from it, on the other side.
Keep the edge even, and if you are following an outline marked on the fabric, take your stitches to the outside of the line so that the marked line does not show.
See the yellow in the picture below.
Long and Short Stitch: This can be good for shading and/or larger areas.
Stitch a row along the edge of the outline, alternating long and short stitches. Next, make long stitches in the gaps that were left when you made the short stitches.
Keep stitching in rows until the shape is filled.
See the red in the picture below.
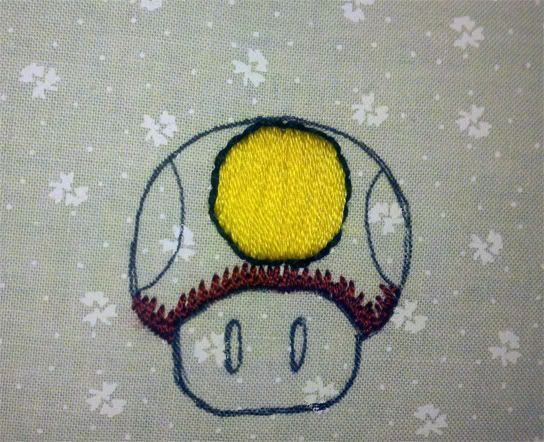
You now have the basic tools to embroider anything! Remember, embroidery is supposed to be fun! I always think of it as drawing with thread. Here is my finished mushroom:
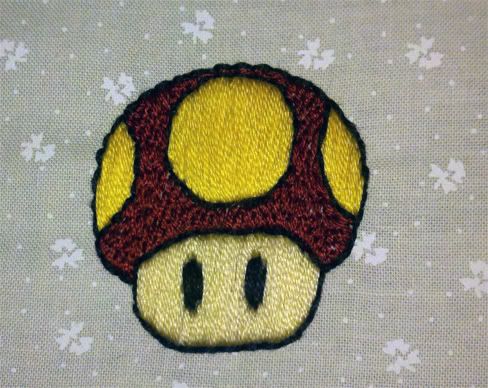
Is it perfect? Oh, my, no. That's what machine embroidery is for. Hand embroidery is more organic. So have fun! I would love to see anything that you make with this tutorial. Please post your projects!